In de winter van 2009, was ik thuis op het internet aan het speuren naar plantenboeken en ik kwam op een Amerikaans forum een stukje tegen over het boek “plant production in containers II”.
Op dit Amerikaans forum schreef een eigenaar van een kwekerij schreef over het boek, dat het als een bijbel voor hem was. Hij heeft zoveel aan het boek gehad, en leest hem nog dagelijks. Dus heb ik naar het boek gezocht en het leek mij gelijk een heel handig boek, omdat er allerlei stellingen in staan, hoe je planten moet kweken in pot. Ik heb het boek besteld en toen ik het doorlas zag ik dat een heel groot gedeelte van het boek over speciale potjes ging.
Deze speciale plantenpotten zorgen ervoor dat de wortels geen rondjes kunnen draaien in een pot, maar voor wortelsnoei zorgen en dus meer wortels aanmaken, voedingstoffen beter opnemen etc. Deze potjes heten Rootmakers, dezelfde naam als het bedrijf wat deze plantenpotten produceert.
Ik heb er mij nu aardig in deze potjes verdiept en een grote bestelling geplaatst bij rootmaker, zodat ik in 2011 met deze potjes kan experimenten.
De werking
Ik zal proberen om de werking van deze potjes uit te leggen.
Als je een zaadje zaait dan maakt het zaadje, als hij ontkiemd een “penwortel” aan.
Dat is de eerste wortel die recht naar beneden groeit. In de natuur is deze “penwortel” soms nodig, maar volgens de Amerikaanse professor Carl Whitcomb voor planten in pot absoluut niet.
Als je, laten we zeggen op de “Whitcomb” manier wilt werken, dan moet je een stek of zaadje aanpakken bij het begin, dus gelijk bij het stekken of bij het zaaien.
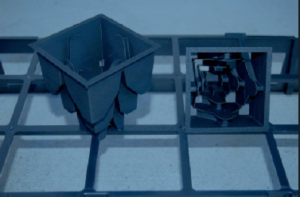
De propagation cells van rootmaker zorgen ervoor dat de “penwortel” door een van de opening van het potje heen groeit en dan “ge-airpruned” wordt.
De wortel groeit door de opening heen en de groeipunt sterft af omdat hij in aanraking komt met lucht.
Binnen 2 of 3 dagen loopt de wortel aan alle kanten uit en je krijgt dan horizontale groeiende wortels, die op hun beurt weer door de openingen aan de zijkanten groeien en afsterven en weer worden er meer en meer wortels aangemaakt.
Op deze manier doet de plant niks anders dan meer en meer wortels aanmaken. Dit zorgt voor alle wortels naar buiten groeien en niet rond rond cirkelen, je planten krijgen meer stamdikte, meer groei en je krijgt gezondere planten, die ook veel sneller gesetteld zijn.
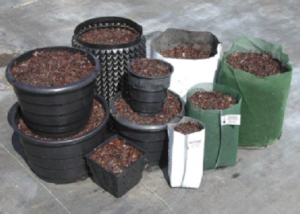
De planten kunnen niet al te lang in deze zaaipotjes blijven staan, afhankelijk van de grote van de propagation cell (meestal 2 maand) en dan worden ze overgepot in een rootmaker/rootbuilder of rootrapper container.
Alle 3 hebben ze de zelfde werking maar verschillen qua uiterlijk en gebruik.
Een bijgaand (Engels) artikel van Carl Whitcomb over de “4 inch rule” dat betrekking heeft op de speciale potjes van rootmaker.
THE 4-INCH RULE:
How to Maximize Root Branching in Containers
Carl Whitcomb, Ph D, Lacebark Inc. 2104 North Cottonwood Road, Stillwater, OK 74075
Anyone that has ever pruned s rubs or trees to make a hedge has experienced the ‘4-inch rule’. It has long been known that when a twig or branch is cut in the pruning process branching occurs, but did you notice where? Typically from the point of the pruning cut and extending back about 4 inches. Allow the numerous branches produced as a result of the first pruning to grow out 4 to 6 inches then prune again and more branching occurs. Branching occurs as a result of removal of the terminal bud, and the hormone that suppresses branching (also known as apical dominance). What has been known only in recent years is the fact that the 4-inch rule applies to roots as well. This is especially dramatic with young roots that are the below ground counterparts to the twigs pruned to create a hedge. As roots grow older they become less responsive to pruning just as occurs with larger limbs and branches. Root tips exert an apical dominance just like twigs. With roots, the white tip is most responsive and when air-root-pruning occurs at the proper location, secondary roots typically begin to form quickly and within 3 to 5 days the 4-inch rule is obvious. By contrast, in nature the tip of a taproot extends downward until conditions become unfavorable (rock, hard subsoil, lack of oxygen, water table, etc.). Only when the tip of the taproot stops growing or dies does secondary branching occur, but by then the tissues just beneath the soil have matured and few branch roots are produced on most species. As a result, only a fraction of the secondary roots form in nature compared to when the tip of the young taproot is air-pruned in a container at a point about four inches below the seed. Horizontal roots respond to the 4-inch rule as well. However, the 4-inch rule does not apply to roots that extend out to the sidewall of smooth conventional containers and circle. The exception is when sun hits the sidewall and kills the roots, which results in heat-pruning. Then the 4-inch rule does apply from the point of root death back around the container. Have you noticed that when a plant is shifted from a small container to an overly large container that the root system is slow to develop where the root ball is firm and you can no longer see the root system ‘flex’
when the wind blows? This is because the up-sizing exceeded the 4-inch rule, and substantial ‘extra’ time in production is required. I have both observed and have been able to create the extreme, where the plant had grown to market size, yet was not salable because of the ‘flex’ in the root system. It is important to note that the 4” rule applies primarily to plants grown in containers. Why? Because root tips can extend aimlessly through the porous container growth medium with little resistance and as a result, little natural branching occurs. By contrast, root tips growing through most field soils experience much more resistance to root extension and as a result, root branching is much greater (the exception would be extremely sandy soils). Therefore, to develop the most fibrous root system the depth of the propagation container should be about 4 inches deep and no more than 8 inches wide. To make a propagation container 8 inches wide consumes far too much space, therefore a container 4 inches deep and 2 “to 4” wide is the practical optimum. When transplanting from the RootMaker® propagation container, respect the 4-inch rule in order to maximize root branching. This means that RootMaker® liners should not be planted into containers larger than approximately 10 to 12 “diameter (2.5 or 4”root ball + 4” on either side).
It is important to note that the 4-inch rule DOES NOT compensate or overcome the problem of leaving plants in a given container size too long. Benefits from RootMaker® air-root-pruning containers is roughly a bell curve — that is, root branching increases, reaching a maximum, then, if transplanting does not occur, root branching and benefits begin to DECLINE. This occurs because there is a limited amount of space in any container and as that space is filled with roots there is little space for new roots. The plant can run out of space and stagnate, even though there is no root circling. The only solution is to transplant in a timely fashion and when the plant needs to be transplanted, not when you get around to it.
By utilizing the 4-inch rule, and root-pruning containers, root branching is maximized throughout the growth medium, roots have maximum access to nutrients and water, which in turn stimulates top growth and improves plant quality. Combine the 4-inch rule with alert and timely transplanting from one root-pruning container to another and plant growth and quality of both tops and roots takes a giant step forward.
[As appeared in NM Pro – Nursery Management & Production, April 2005, pages 69-70.]
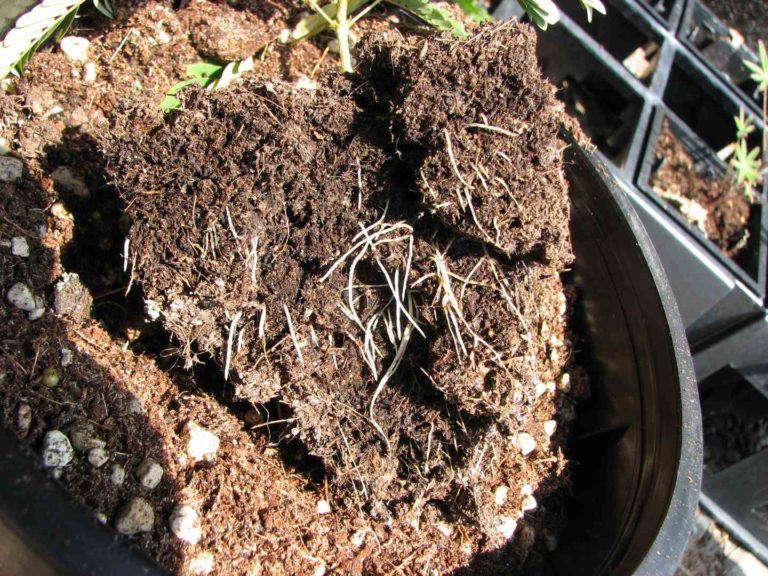
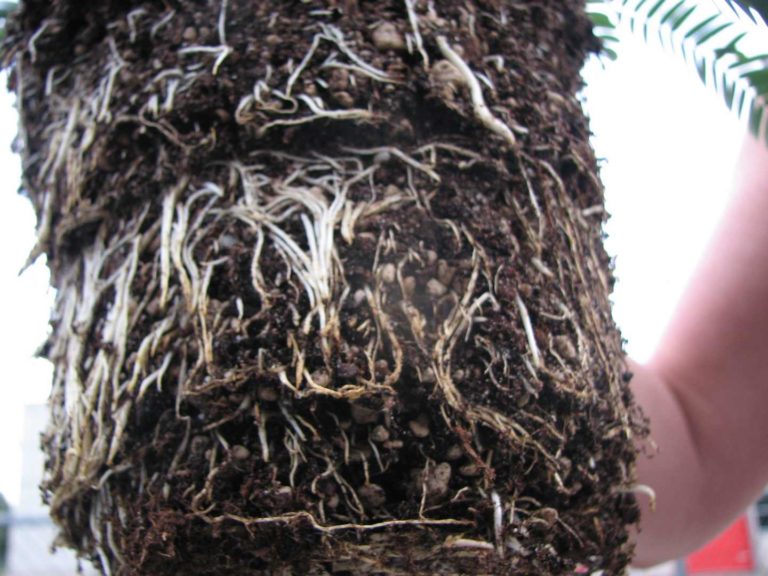
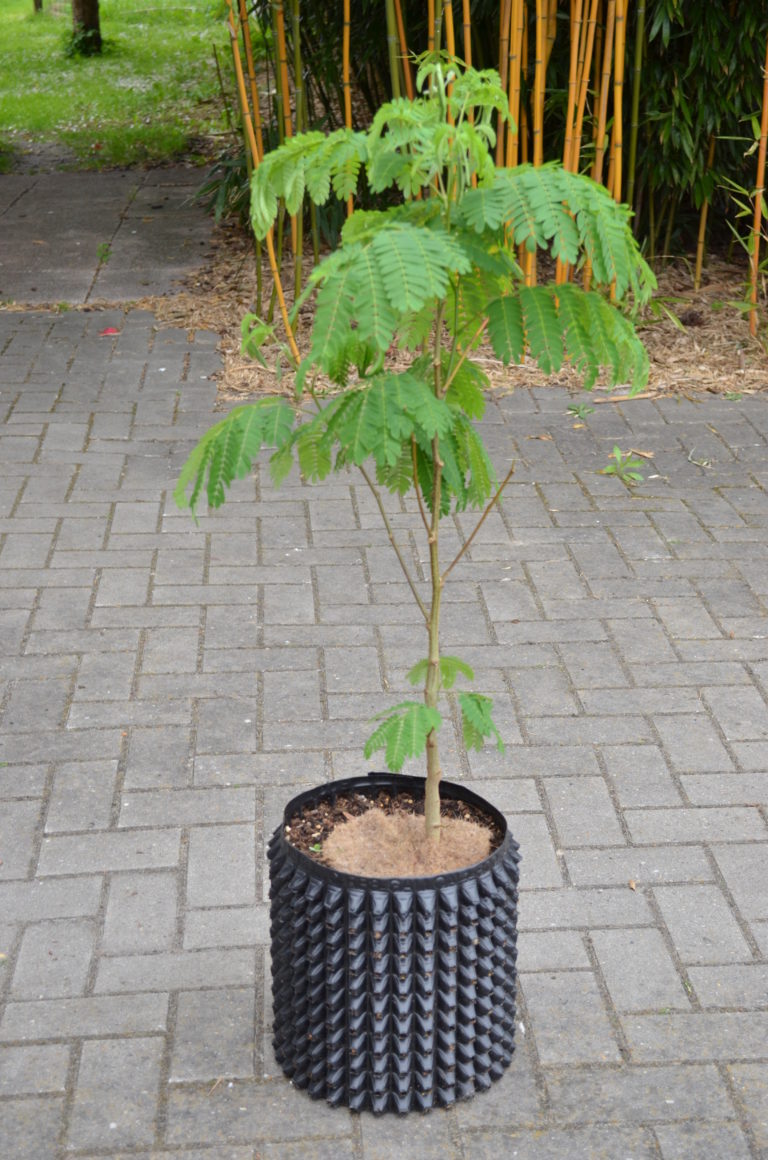
Foto’s boven: op 12 juni 2011 heb ik enkele albizia coreana’s overgepot. Ze stonden in een rootmaker Express 18 Injection-molded Tray. Ik was positief verast door het aantal wortels; zoals u kunt zien op beide foto’s. Opvallend is het aantal witte wortels en geen enkel worteltje draait om de kluit heen. Voor mij is dit het bewijs dat de potjes hun werk doen.